 Search
 English
 中文简体
中文简体 Deutsch
 Español
Content
- 1 Why HVLP Delivers a Cleaner Finish
- 2 What You Need Before You Spray
- 3 Setting Up Your HVLP Sprayer
- 4 Spraying Technique That Prevents Defects
- 5 Common HVLP Spraying Problems and Fixes
- 6 Cleaning and Maintenance: the Last Step of Every Job
- 7 HVLP Sprayer FAQ
- 7.1 Q1: What does HVLP stand for?
- 7.2 Q2: Do I need a special compressor for an HVLP spray gun?
- 7.3 Q3: What air pressure should I set on an HVLP spray gun?
- 7.4 Q4: Why is my HVLP sprayer spitting paint?
- 7.5 Q5: How much should I thin latex paint for an HVLP sprayer?
- 7.6 Q6: How do I clean an HVLP spray gun after use?
You have a new HVLP gun in your hands, a cup of fresh paint, and a surface you would rather not repaint. The first pass usually looks fine, but the second pass can quickly turn into runs, sags, and dry, dusty patches near the edges. If that sounds familiar, the gun itself is rarely the problem.
Here is the conclusion worth remembering: an HVLP sprayer produces a clean, even finish only when three factors work together — the air supply, the paint viscosity, and the way you move the gun. None of these is difficult to get right on its own, but skipping any one of them shows up immediately in the coating. This guide explains how to use an HVLP sprayer from setup through cleanup, with the pressures, distances, overlap, and maintenance habits that actually matter.
Why HVLP Delivers a Cleaner Finish
HVLP stands for High Volume, Low Pressure. The gun atomizes paint by pushing a large volume of air through the air cap at a low pressure — roughly 10 psi at the cap, and usually 25–30 psi at the air inlet. That soft, high-volume airstream is why HVLP guns bounce far less paint off the surface than conventional compressed-air spray guns.
The most useful measure here is transfer efficiency: the percentage of coating that leaves the nozzle and actually lands on the workpiece. Figures commonly cited in EPA and finishing industry guidelines put conventional air spray guns at roughly 30–40% transfer efficiency, while a properly tuned HVLP gun typically reaches 65% or better. For a cabinet or a car panel, that difference means less material used, less overspray, and a cleaner work area.
The trade-off is air demand. HVLP requires a continuous volume of air; if the compressor cannot keep up, the pattern narrows, the fan flickers, and the finish turns patchy. That is why the air supply is the first thing to sort out.
What You Need Before You Spray
Get these four elements ready before you mix any material. Skipping one of them is the most common reason a first HVLP session ends in a re-sand.
- Air supply. A compressor-fed HVLP gun consumes roughly 6–9 CFM at the recommended inlet pressure. The compressor must hold that output continuously, and the outgoing air should pass through a water/oil separator. Turbine-based HVLP systems have their own blower, which removes the compressor question entirely.
- Correct nozzle and needle set. Nozzle sizes generally run from 1.0 mm to 2.5 mm. A 1.3–1.4 mm set suits automotive primer, basecoat, and clearcoat; 1.7–2.0 mm handles wood primers and higher-viscosity materials.
- Paint preparation. Strain every coating through a disposable mesh filter before it goes into the cup. Two-component paints should be mixed thoroughly and left for a few minutes to deaerate.
- A ventilated workspace. Overspray particles build up quickly. At minimum, work in a space with cross-ventilation; a proper spray booth is better for large jobs.
If you are still choosing a gun, look for a stainless steel fluid path for solvent compatibility, a comfortable trigger reach, and a replaceable air cap, needle, and nozzle assembly. These details determine how easy the gun is to live with over years of use.
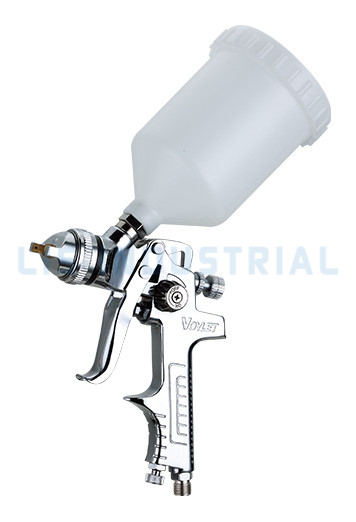
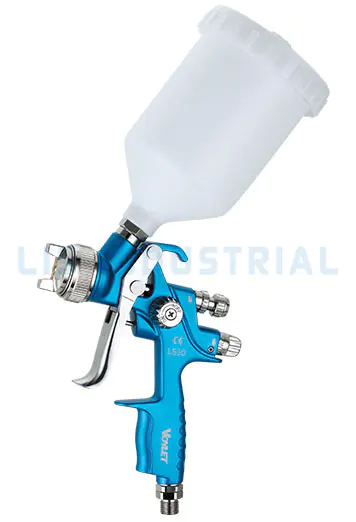 Voylet LS30 Pneumatic HVLP Gravity Feed Spray Gun with 20oz CupThis HVLP gravity feed spray gun features a stainless steel fluid path, chrome-plated brass air cap, and adjustable nozzle sizes, making it a practical choice for automotive, woodwork, and plastic coating projects.View Product →
Setting Up Your HVLP Sprayer
Once the equipment is in place, follow these four setup steps in order. Each step takes less than a minute, but the combined effect on the finish is huge.
- Connect the air line and set the inlet pressure. For most gravity-feed HVLP guns, start at 25–29 psi at the gun inlet. The air cap pressure then settles at roughly 10 psi. If your gun is a conversion type or is fed by a turbine, follow the manufacturer's stated values for your HVLP spray gun.
- Fill and strain the material. Pour the paint through a mesh filter into the cup. For waterborne finishes, thin gradually with water, usually 5–10%, until the paint flows off a stirring stick in a smooth, continuous ribbon.
- Set the fluid and fan controls. Turn the fan control counterclockwise to widen the pattern; turn the fluid control clockwise to reduce paint flow. Begin with the fan wide open and the fluid control about flush with the gun body.
- Test on scrap material. Spray a two-second burst onto cardboard and study the pattern. A healthy HVLP pattern is a symmetrical oval with fine, even droplets. If the pattern is heavier on one edge, the air cap is dirty or the fluid flow is set too high.
The diagram above labels the parts you will adjust most often. The fluid knob controls paint volume, the air cap shapes the fan, and the trigger should move only after the gun is already traveling at a steady speed.
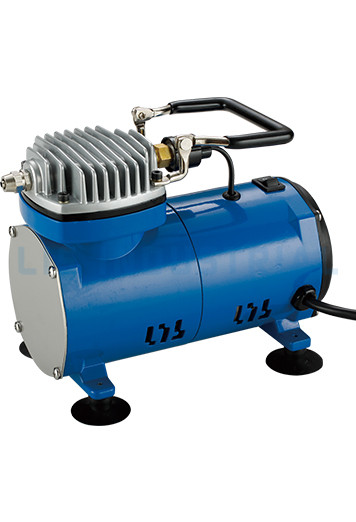 V-505 Portable Airbrush Mini Air Compressor by Lis IndustrialA compact oil-free air compressor specifically designed for airbrushing, with a 95W motor, 0.65 CFM displacement, and 1/4" gas thread connector, ideal for portable painting tasks.View Product →
Spraying Technique That Prevents Defects
Technique is where finishes are won or lost. Use these specific numbers during your first sessions and you will see the difference immediately.
- Keep the gun perpendicular to the surface. Tilting the gun makes one edge of the fan lay down more paint than the other, creating stripes that only appear after the coat flashes.
- Hold the gun 6–8 inches (15–20 cm) from the surface. Closer than 6 inches produces runs; farther than 8 inches lets droplets dry in flight and creates a rough, dusty texture.
- Trigger only while moving. Begin the stroke, squeeze the trigger, move across the surface, and release the trigger just before changing direction. Triggering at the end of a stroke is the main cause of heavy edges and sags.
- Overlap each pass by 50%. Let the next pass cover half of the previous fan. This gives a uniform film thickness and prevents tiger stripes and thin spots.
The chart above compares two ways of laying down a coating. Without overlap, the film profile forms peaks and valleys; with 50% overlap, the surface flattens into a consistent thickness that cures evenly and needs far less sanding.
A separate guide on how to hold and operate a paint spray gun covers hand position and wrist motion in more detail, which is especially useful when you are spraying vertical panels for the first time.
Common HVLP Spraying Problems and Fixes
Even careful finishers see defects. The key is diagnosing the cause quickly rather than trying to compensate with more paint or more pressure. This table covers the problems that account for most failed HVLP jobs.
| Defect | Typical cause | Corrective action |
| Runs and sags | Excess fluid flow, gun held too close, slow pass speed | Reduce fluid flow, increase distance, speed up the stroke |
| Orange peel | Paint viscosity too high, atomization pressure too low | Thin the paint slightly, raise inlet pressure by 2–3 psi |
| Dry spray | Gun held too far, pass too fast, high air flow | Move closer, slow down, reduce air cap pressure |
| Fisheyes | Silicone, oil, or wax contamination on the surface | Degrease thoroughly, use a fisheye eliminator additive |
| Spitting or sputtering | Air trapped in the fluid line, loose cup, low paint level | Tighten the cup, purge the material line, keep the cup at least one-quarter full |
| Uneven fan pattern | Clogged air cap holes, worn nozzle, low air volume | Clean the air cap, replace worn parts, check compressor CFM |
| Uneven fan pattern | Clogged air cap holes, worn nozzle, low air volume | Clean the air cap, replace worn parts, check compressor CFM |
Most of these defects come down to three variables: distance, speed, and fluid flow. Change one at a time and re-test on cardboard before returning to the workpiece.
Cleaning and Maintenance: the Last Step of Every Job
Cleaning is not optional. A gun left with wet paint for even an hour can develop dried material inside the nozzle that no solvent will fully remove later. The following routine takes five minutes and protects the precision parts that determine finish quality.
- Empty the cup and flush it with the correct solvent immediately after spraying.
- Remove the air cap and soak it in solvent. Never clean precision air cap holes with wire or metal picks.
- Wipe the needle, nozzle, and fluid tip with a soft cloth.
- Lubricate the trigger pivot and needle packing with a drop of light oil.
- Store the gun with the fluid needle slightly loosened to relieve pressure on the packing seal.
If you regularly switch between primers, color coats, and clear coats, a ready-made spray gun kit lets you swap between setups without a full strip-down in the middle of a job.
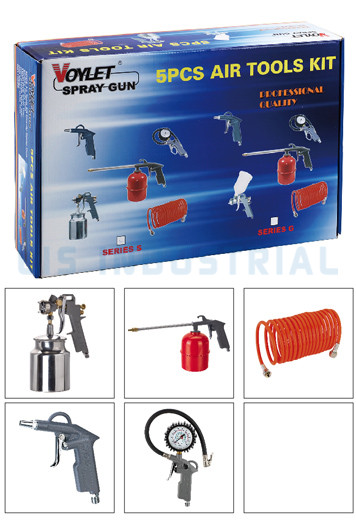 AK1 Spray Gun Kit from Lis Industrial for Multi-Coating JobsThis ready-made spray gun kit provides a versatile setup for switching between primers, color coats, and clear coats without full cleanings, suitable for high-volume low-pressure applications with minimal overspray.View Product →
HVLP Sprayer FAQ
Q1: What does HVLP stand for?
High Volume, Low Pressure. It is a spray gun that uses a high volume of air at low pressure, about 10 psi at the air cap, to atomize paint with minimal overspray and high transfer efficiency.
Q2: Do I need a special compressor for an HVLP spray gun?
Yes. Compressor-fed HVLP guns generally need 6–9 CFM of continuous airflow. Turbine-based HVLP systems include their own blower and work without a shop compressor.
Q3: What air pressure should I set on an HVLP spray gun?
Most gravity-feed HVLP guns run at 25–30 psi at the air inlet, which produces about 10 psi at the cap. Start low and increase pressure gradually while checking the pattern.
Q4: Why is my HVLP sprayer spitting paint?
Air in the fluid line, a loose feed cup, or too little paint in the cup can cause spitting. Tighten the cup, purge the material line, and keep the cup at least one-quarter full.
Q5: How much should I thin latex paint for an HVLP sprayer?
Start with 5–10% water by volume. Viscosity depends on temperature, humidity, and brand. If possible, measure with a viscosity cup and always test-spray on cardboard first.
Q6: How do I clean an HVLP spray gun after use?
Flush with solvent, soak the air cap, wipe the needle and nozzle, lubricate the trigger pivot, and store with the needle loosened to protect the packing seal.