Search
 English
 中文简体
中文简体 Deutsch
 Español
Content
- 1 Understanding the Three Core Controls on an HVLP Spray Gun
- 2 Choosing the Right Nozzle Size for Your Material
- 3 Step-by-Step: How to Adjust Your HVLP Spray Gun Before Spraying
- 4 Setting Up an HVLP Spray Gun for Automotive Clear Coat
- 5 Gun Distance and Movement: The Technique Variables That Determine Finish Quality
- 6 Diagnosing and Fixing Common Finish Defects
- 7 Cleaning and Maintaining Your HVLP Spray Gun for Consistent Results
- 8 About Ningbo Lis Industrial Co., Ltd.
- 9 Frequently Asked Questions
The direct answer: achieving a perfect finish with an HVLP spray gun comes down to correctly balancing three controls — fluid needle, fan pattern, and air pressure — matched to the specific material you are spraying and the target surface. Get these three variables dialed in together, and the gun delivers a smooth, even coat with minimal overspray and no runs. Skip the calibration step, and even high-quality material will produce orange peel, dry spray, or sagging.
This guide walks through every adjustment on the HVLP spray gun in practical terms — from understanding what each knob does, to setting up for specific applications including automotive clear coat, to diagnosing and correcting the most common finish defects.
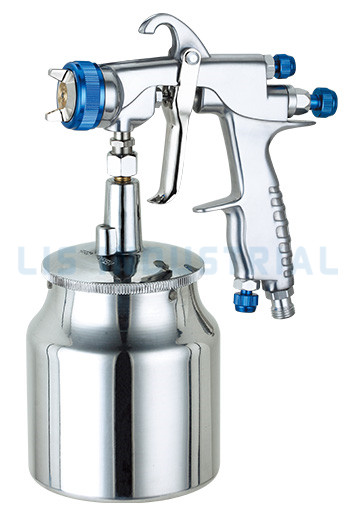
Understanding the Three Core Controls on an HVLP Spray Gun
Before making any adjustments, it is essential to understand what each control actually does. Turning knobs without this understanding leads to chasing problems in the wrong direction.
Fluid Needle Adjustment (Rear Knob)
The fluid needle knob controls how far the needle retracts when you pull the trigger — which directly determines how much material flows through the tip per second. Turning it clockwise reduces flow; counterclockwise increases it. This is the primary control for matching material output to application speed. For most spray jobs, start with the knob set to about two-thirds open and adjust from there.
Fan Pattern Adjustment (Middle Knob)
The fan pattern knob controls the air horns on the air cap, shaping the spray from a round spot to a wide, flat ellipse. A fully open fan (typically 8–12 inches wide at 6–8 inches distance) is ideal for large flat surfaces. A tighter, rounder pattern suits small parts, edges, and corners. Reducing fan width while keeping fluid flow constant increases material buildup per pass — which can cause runs.
Air Pressure (Regulator at Inlet)
HVLP technology is defined by its operating principle: high volume of air at low pressure — typically 6–10 PSI at the air cap (not the compressor regulator). Inlet pressure is set at the gun's air inlet regulator, commonly 26–29 PSI for most gravity-feed HVLP guns, which steps down to the required low cap pressure. Higher pressure atomizes better but wastes more material and creates more overspray. Lower pressure gives softer atomization and better transfer efficiency — the reason HVLP guns transfer 65–90% of material to the surface, compared to 25–40% for conventional spray guns.
Choosing the Right Nozzle Size for Your Material
Nozzle (tip) size is a fixed specification for each gun setup, not an adjustable control — but selecting the right size before you start is as important as any adjustment. Mismatched nozzle size is one of the most frequent sources of poor atomization and finish defects.
| Table 1: HVLP spray gun nozzle size selection guide by material viscosity and application | ||
| Nozzle Size (mm) | Material Viscosity | Typical Applications |
| 0.8 – 1.0 | Very thin | Stains, dyes, thin sealers |
| 1.2 – 1.3 | Thin to medium | Automotive base coat, clear coat, lacquers |
| 1.4 – 1.5 | Medium | Urethanes, single-stage enamels, primers |
| 1.7 – 2.0 | Medium to heavy | High-build primers, epoxy primers, fillers |
| 2.0 – 2.5 | Heavy | Thick latex paint, texture coatings |
For HVLP spray gun for automotive clear coat, a 1.2–1.3 mm nozzle is the industry standard. Clear coat is formulated to be sprayed at relatively low viscosity, and the smaller orifice delivers fine atomization that creates the glassy, mirror-like surface expected from a quality clear coat application.
Step-by-Step: How to Adjust Your HVLP Spray Gun Before Spraying
Follow this sequence every time you set up the gun with a new material or for a new job. Skipping steps leads to wasted material and rework.
- Check and adjust material viscosity: Measure material with a viscosity cup (typically a Zahn #2 or Ford #4 cup). Most spray-ready materials should drain in 18–25 seconds. If too thick, add the appropriate reducer per the manufacturer's ratio — never exceed the recommended thinning percentage
- Set inlet air pressure: Connect the gun to the air supply and set the regulator with the trigger pulled. For most HVLP gravity guns, set to 26–29 PSI at the inlet. Use an air cap test kit if available to verify cap pressure is within the 6–10 PSI HVLP range
- Open the fan pattern fully: Turn the fan adjustment knob fully counterclockwise to maximum width. You will refine this after the test spray
- Set fluid needle to two-thirds open: Back the fluid needle knob out about two-thirds from fully closed as a starting point
- Perform a test spray on cardboard or paper: Hold the gun 6–8 inches from the surface, pull the trigger fully, and make a quick single pass. Examine the pattern shape, edge definition, and material distribution
- Evaluate and adjust: The ideal test pattern is a uniform ellipse — even distribution edge to edge, no heavy center, no dry edges. Adjust based on what you see (see defect guide below)
- Spray a test panel at working speed: Apply a full wet coat at your planned application speed (typically 12–18 inches per second). Check for runs, dry spray, or orange peel and make final adjustments
Setting Up an HVLP Spray Gun for Automotive Clear Coat
Clear coat application is where HVLP technology genuinely shines — and where setup precision matters most. A single pass with wrong settings on clear coat means sanding, re-clearing, or worse. Here is the precise setup for using an HVLP spray gun for automotive clear coat:
Material Preparation
- Mix clear coat with activator/hardener at the manufacturer's specified ratio (commonly 4:1 or 2:1 by volume)
- Thin if needed with the appropriate reducer — typically 10% maximum for most urethane clears. Over-thinning drops solids content and reduces gloss and durability
- Strain the mixed clear through a 125-micron filter before loading the cup to remove any unmixed particles or debris
- Allow mixed clear to induction for 10–15 minutes if specified by the manufacturer before spraying
Gun Settings for Clear Coat
- Nozzle: 1.2–1.3 mm
- Inlet air pressure: 26–28 PSI (with trigger pulled)
- Fan pattern: Full open (maximum width)
- Fluid needle: Two-thirds to fully open
- Gun distance: 6–8 inches from the panel surface
- Pass speed: Smooth, consistent 12–15 inches per second
- Overlap: Each pass overlaps the previous by 50% (bisecting the prior fan width)
Application Sequence for Clear Coat
Most urethane clear coats are applied in two to three wet coats with a 5–10 minute flash time between coats. The first coat is a medium-wet tack coat; the second is a full wet coat applied edge-to-edge. A third flow coat can be added for maximum gloss if the clear coat product supports it. Apply in an environment between 65–75°F (18–24°C) with humidity below 60% for optimal flow and curing.
Gun Distance and Movement: The Technique Variables That Determine Finish Quality
Even with perfect gun settings, poor technique produces poor results. Gun distance and movement speed work in combination with your adjustments to determine the final film build and appearance.
Distance from Surface
The standard working distance for an HVLP spray gun is 6–8 inches (15–20 cm) for most finish coats. Moving closer increases film build and gloss but raises the risk of runs. Moving farther away dries the droplets before they fully coalesce, causing orange peel or dry spray. For primers and high-build coats, 8–10 inches is acceptable. Never arc the gun — always keep it perpendicular to the surface and move in a straight, parallel stroke.
Pass Speed
Pass speed and fluid flow must be balanced. Moving too slowly with high fluid flow causes runs. Moving too fast with low fluid flow causes thin, dry-looking coats. A consistent 12–18 inches per second is the practical range for most finish work. Practice on cardboard until your speed is consistent before committing to the actual workpiece.
Diagnosing and Fixing Common Finish Defects
Most finish defects from an HVLP spray gun trace back to one of the three core adjustments being out of balance. Use this reference to identify the cause and correct it quickly.
| Table 2: Common HVLP spray gun finish defects, causes, and corrective adjustments | ||
| Defect | Most Likely Cause | Correction |
| Orange peel texture | Pressure too high, gun too far, material too thick, or moving too fast | Reduce pressure slightly; move gun closer; thin material; slow pass speed |
| Runs / sags | Too much fluid flow, gun too close, pass too slow, or too many coats without flash time | Reduce fluid needle opening; increase gun distance; move faster; allow adequate flash time |
| Dry / dusty spray | Gun too far from surface, pressure too high, or material too thin | Move gun closer; reduce air pressure; check thinning ratio |
| Heavy center / thin edges | Fan pattern partially closed or air cap dirty/blocked | Open fan pattern fully; clean or replace air cap; check for blocked air horn holes |
| Spitting / uneven spray | Air in fluid system, low fluid level, or loose fluid needle packing | Check fluid level; tighten needle packing nut; check all fittings for air leaks |
| Fish eyes | Silicone or oil contamination on the surface or in the air supply | Clean surface; install inline moisture/oil separator; clean gun cup and passages |
Cleaning and Maintaining Your HVLP Spray Gun for Consistent Results
A well-maintained gun holds its calibration and delivers consistent performance. Most spray defects in production environments are caused by partially clogged passages, worn needle tips, or dried material in the air cap — all preventable with proper cleaning.
- Clean immediately after every use: Flush the cup and passages with the appropriate solvent (water for water-based, lacquer thinner or gun wash for solvent-based) before material can harden
- Never soak the entire gun in solvent: This damages seals and O-rings. Disassemble and clean only the fluid-contact parts
- Clean air cap holes with a toothpick or soft bristle: Never use metal tools — this enlarges the precisely sized holes and permanently changes atomization behavior
- Inspect needle tip and nozzle seat every 20–30 hours of use: Wear at the needle tip seat causes fluid leak-back and inconsistent atomization. Replace the needle and nozzle as a matched set
- Lubricate needle packing and air valve stem lightly: Apply a small drop of petroleum jelly or gun lubricant to keep seals supple and prevent sticking
- Store with fluid passages dry and lightly lubricated: Prevents corrosion of internal passages between uses
About Ningbo Lis Industrial Co., Ltd.
Ningbo Lis Industrial Co., Ltd. is an advanced China HVLP Spray Gun Manufacturer and HVLP Gravity Feed Spray Gun factory. All products have passed international certifications including CE and GS, reflecting the company's firm commitment to the highest standards of product quality. With a strong R&D team, Lis provides OEM, ODM, and custom manufacturing services based on customer drawings, samples, or specific requirements — covering both air and pneumatic HVLP spray gun configurations.
Lis has established a worldwide marketing and service network, with products widely distributed across Europe, North America, the Middle East, South Africa, and East Asia, building strong and lasting business relationships across these regions. Pursuing the highest standards of product quality is at the core of everything Lis does — ensuring that every spray gun that leaves the factory delivers the performance professionals depend on.