 Search

 English
 中文简体
 Deutsch
 Español
Content
- 1 The parts list and the job each one owns
- 2 Follow the two paths: air coming in, paint going out
- 3 Air cap, nozzle and needle are a matched set
- 4 The three adjusters, and the order to set them
- 5 Cup, lid, vent and seals
- 6 Symptom-to-part troubleshooting map
- 7 Cleaning rules that protect the matched set
- 8 Buying spare parts that actually fit
- 9 Frequently asked questions about HVLP spray gun parts
Most HVLP spray gun faults announce themselves long before you reach for a wrench. A fan that keeps one heavy edge usually points at a blocked air cap horn. A spray that pulses in time with the trigger points at the fluid nozzle and needle. Paint creeping down the cup thread points at a swollen lid gasket. An HVLP gun is a short chain of parts, and each part owns one specific symptom. Learn that mapping and diagnosis stops being guesswork, while spare-part ordering stops being expensive guesswork.
The parts list and the job each one owns
An HVLP gun looks like a single tool, but it is two systems that only meet at the tip: an air circuit and a fluid circuit. Every component belongs to one of them. That is genuinely useful in practice, because a symptom usually rules out half the gun before you pick up a spanner.
| Part | What it does | Symptom when it fails |
| Air cap with horns | Shapes compressed air into a ring that atomises paint, then into two jets that flatten the cloud into a fan | Crescent or banana pattern; dry, stringy atomisation |
| Fluid nozzle | Meters coating out of the cup and provides the seat the needle closes against | Pulsing spray; paint building on the cap face |
| Fluid needle | Opens and closes the nozzle; its taper controls how much material passes | Dripping after trigger release; flow that will not shut off |
| Needle packing and nut | Seals the needle where it passes through the body, keeping air and paint inside | Paint around the fluid knob; stiff or grabby trigger |
| Fluid control knob | Limits needle travel and sets maximum paint flow | Knob turns but flow does not change |
| Pattern (fan) knob | Bleeds air to the cap horns to widen or narrow the fan | Fan stays round or cannot be narrowed |
| Air valve and trigger | Starts and stops atomising air at the cap | Air hisses after release; spongy trigger feel |
| Cup, lid, vent and gasket | Holds the coating, seals it, and lets air in as paint leaves | Starved flow that improves when the lid is loosened |
| Inlet strainer | Traps grit before it reaches the nozzle seat | Repeated nozzle blockage; weak flow at full trigger |
The order matters when you troubleshoot. Check the air cap and horns first because they are the fastest to inspect and the most common cause. Then the sealed fluid path, then cups and fittings.
Follow the two paths: air coming in, paint going out
Air enters through the inlet fitting, passes the gun-mounted air adjuster, opens at the air valve when you pull the trigger, and then splits at the cap. One ring of holes around the centre atomises the paint; the two horns flatten that cloud into a fan. The pattern knob does not change how much paint flows, which is why it only ever changes the shape of the pattern.
Figure 1. Gravity-feed HVLP gun in isometric cutaway view. The numbers follow the order most technicians use when tracing a fault.
Paint travels the other way: cup, strainer, the seat between needle and nozzle, then out of the tip. On a gravity or suction gun it is drawn out by the low pressure created at the air cap rather than pushed; on a pressure-feed setup a regulated pot adds the push. Either way, the fluid only leaves the gun because the cap is doing its job.
Air cap, nozzle and needle are a matched set
The cap, nozzle and needle are machined to work as one assembly. Clearances are measured in hundredths of a millimetre, and the needle taper must match the nozzle seat exactly. Fit a needle from one set into a nozzle from another and the gun will either leak at rest or starve at full trigger, no matter how carefully you adjust it. When ordering spares, quote the exact model number and buy the set together, not just the part that looks worn. Our own HVLP spray gun range is organised this way, with nozzle sets listed per model rather than as universal fitments.
Match the nozzle to the coating, not to the gun
Most HVLP bodies accept several nozzle sizes. The size you fit decides how much material passes per second, and that is mostly a question of what you are spraying rather than which gun you own.
Figure 2. Typical fluid nozzle sizes by application. Thinner coatings need smaller nozzles and finer atomisation; high-build materials need the volume.
Why the cap geometry decides efficiency
Regulations give HVLP a measurable definition rather than a marketing one: at least 65 percent of the coating must reach the target, with atomising air at 10 psi or less at the air cap. That is roughly a third of the pressure a conventional gun runs at, so the cap has to create the same breakup using air volume instead of speed.
Figure 3. Transfer efficiency comparison. The 65 percent threshold at 10 psi or less at the cap follows US EPA and CARB HVLP definitions; the conventional air spray range is the one most often cited in coating industry literature.
The three adjusters, and the order to set them
Almost every "the gun is faulty" call we receive traces back to adjustment order. Set the controls in this sequence and most faults disappear before you dismantle anything:
- Back the fluid knob out about two turns from lightly seated. That is your starting flow, not your final flow.
- Open the pattern knob, then pull the trigger fully and watch the fan on a scrap panel.
- Set inlet pressure with the trigger held open and air flowing. Static pressure with the trigger closed reads high and will leave you atomising too dry.
- Fine-tune flow with the fluid knob, then reshape the fan with the pattern knob. Adjusting the pattern first and the fluid last is what causes most "streaky then flooded" complaints.
Repeatability matters more than any single setting. A gun whose fluid knob drifts or whose pattern knob has lost its detent will never hold a recipe, and painters compensate by moving faster, which shows up later as uneven film build.
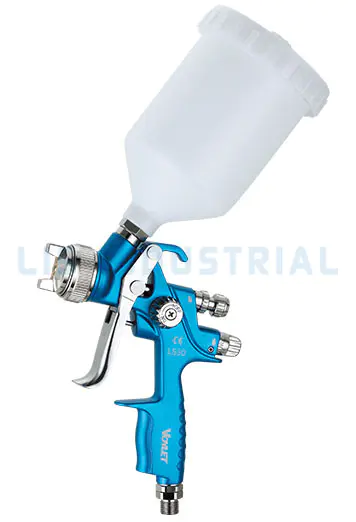
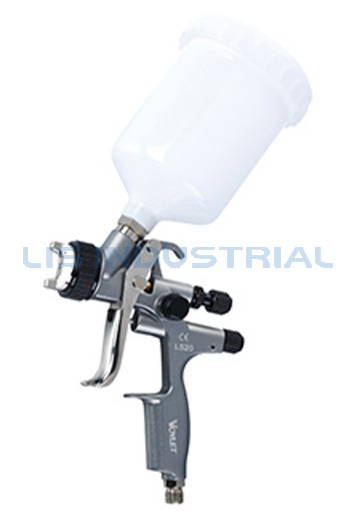 LS20 Gravity-Feed HVLP Spray GunChoose this gravity-feed HVLP gun for repeatable coating work: 600 ml cup, 1.3/1.7 mm nozzles, 29 PSI, and automotive, plastic, metal, and wood uses.View Product →
Cup, lid, vent and seals
Feed type changes what the cup has to do. A gravity cup sits above the body and gives a small positive head of paint. A suction gun draws paint up a tube from below. A pressure pot pushes material to the gun, which is why pressure-feed guns can run a larger nozzle without starving. In all three, the vent is the part people forget: block it and the cup cannot replace the paint leaving it, so flow fades mid-panel and returns when you loosen the lid.
- Clear the vent hole with a soft probe, never a wire that can ream it oversize.
- Check the lid gasket for swelling after waterborne or aggressive solvent use; a swollen seal will not seat again.
- Tighten the lid by hand only. Over-torque deforms the cup rim and creates a leak the gasket cannot fix.
- Keep one spare gasket and one spare strainer per gun. They cost little and end most mid-job stoppages.
 LS40 HVLP Spray Gun with Multiple Nozzle OptionsFor symptom-first troubleshooting, this HVLP gun offers a forged aluminium body, 1.0–2.2 mm nozzles, 430 L/min air use, and CE/GS certification.View Product →
Symptom-to-part troubleshooting map
Use the symptom first, the part second. Working in that order avoids the common mistake of replacing a nozzle when the real problem was an air horn half full of dried clearcoat.
| Symptom | Check first | Usual remedy |
| Spitting or pulsing in time with the trigger | Nozzle seat and needle tip | Clean the seat, replace as a matched set if worn |
| Fan with one heavy edge | Air cap horns | Soak the cap, clear horn holes with a soft tool |
| Pattern stays round and will not widen | Pattern knob and horn air passage | Check knob travel, clear the passage |
| Paint on the cap face and tip | Nozzle seating and cap torque | Reseat the nozzle, check the cap is fully home |
| Weak flow that improves when the lid is loosened | Cup vent | Clear the vent hole |
| Stiff trigger, paint at the fluid knob | Needle packing | Loosen the packing nut slightly, replace worn packing |
| Air leaks after trigger release | Air valve | Clean or replace the valve |
| Drip from the tip after spraying | Needle to nozzle seal | Clean debris from the seat, replace if lapped |
Cleaning rules that protect the matched set
Cleaning destroys more HVLP guns than spraying does. The most common mistake is soaking the entire gun in thinner, which attacks the packing, gaskets and any lubricant on the needle. Flush the fluid path with the thinner suited to the coating, wipe the outside, and leave the internals assembled. If you want the wider context on where low-pressure atomisation pays off and where it does not, these advantages and trade-offs of HVLP are worth five minutes before you buy a second gun.
- Flush with the coating's own thinner, then flush again with a small amount of clean thinner.
- Never poke nozzle or cap holes with wire. Use a soft brush, a wooden point or a dedicated nozzle tool.
- Put a drop of gun lubricant on the needle where it passes the packing, not inside the air passages.
- Store the gun with the fluid knob backed off so the needle spring is not compressed for months.
- Hang the gun; do not stand it on the cap, which is the most easily damaged part on the tool.
Buying spare parts that actually fit
Spares are model-specific, not category-specific. Two guns that look identical from a metre away can use different needle tapers, different packing sizes and different cap thread pitches. Keep a note of the model and the nozzle size stamped on the nozzle itself, and order that combination. If you run several guns across different markets, standardised series such as EU, US, Japan and G/B patterns help keep kits interchangeable on site, which matters more than the unit price once a crew is standing idle.
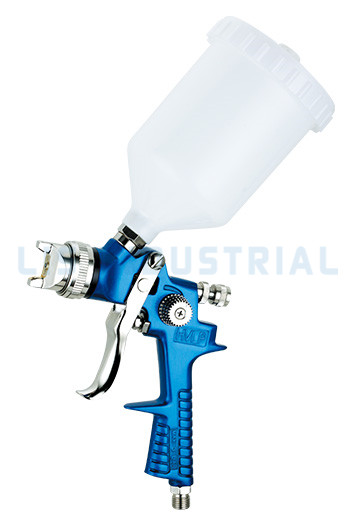 H881 Gravity-Feed HVLP Paint SprayerGravity-feed HVLP sprayer with 600 ml cup, 1.4/1.7/2.0 mm nozzle options, 43 PSI, and G1/4-inch inlet for model-specific parts planning.View Product →
Frequently asked questions about HVLP spray gun parts
The air cap, fluid nozzle and fluid needle form the working core; the needle packing, fluid knob and pattern knob control and seal them. The cup, lid vent, inlet strainer and air valve complete the tool.
Look for a drip from the tip after the trigger is released, or a spray that pulses. Hold the parts to a light: a visible ring or groove on the needle taper means the set is worn.
Around 1.3 mm suits basecoat and 1.4 mm suits clearcoat; 1.7 to 2.0 mm is normal for primer. Always match the needle to the nozzle as a set.
Usually debris on the nozzle seat, a loose cap, or a blocked cup vent. Clean the seat, check the cap is fully home, and clear the vent hole before replacing anything.
No. Cap threads, needle tapers and packing sizes differ between models, and a mismatched pair will leak or starve even when it appears to assemble correctly.
Gaskets and strainers are consumables to be checked monthly. Needle and nozzle sets last from months to years depending on abrasive coatings, cleaning habits and daily spray hours.