Search
 English
 中文简体
中文简体 Deutsch
 Español
Content
- 1 What Makes an HVLP Spray Gun Different
- 2 Choosing the Right Nozzle Size for Your Material
- 3 Thinning Your Paint to the Correct Viscosity
- 4 Setting Up Your HVLP Spray Gun: Step-by-Step
- 5 Spray Technique: Distance, Speed, and Overlap
- 6 Air Supply Requirements You Cannot Ignore
- 7 How to Spray Automotive Panels with an HVLP Gun
- 8 Cleaning Your HVLP Spray Gun After Every Use
- 9 Troubleshooting Common HVLP Finish Problems
- 10 About Ningbo Lis Industrial Co., Ltd.
- 11 Frequently Asked Questions
The fastest way to get a flawless, professional-grade finish is to set up your HVLP spray gun correctly before you ever pull the trigger. That means dialing in the right air pressure (typically 26–29 PSI at the cap), thinning your material to the right viscosity, and maintaining a consistent 6–8 inch distance from the surface. Get those three factors right, and you will eliminate 90% of the common finish defects that cause rework.
This guide walks through every stage — from equipment setup to final coat — with the practical specifics that separate a mediocre result from a production-quality finish.
What Makes an HVLP Spray Gun Different
HVLP stands for High Volume, Low Pressure. Unlike conventional spray guns that atomize paint at 40–60 PSI and waste up to 70% of material through overspray, an HVLP spray gun operates at a cap pressure of 10 PSI or less (in true HVLP systems) with a high air volume — delivering a transfer efficiency of 65–85%. That means more material lands on the surface and less is lost to the air.
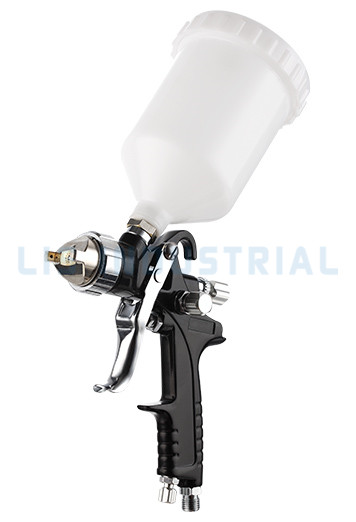
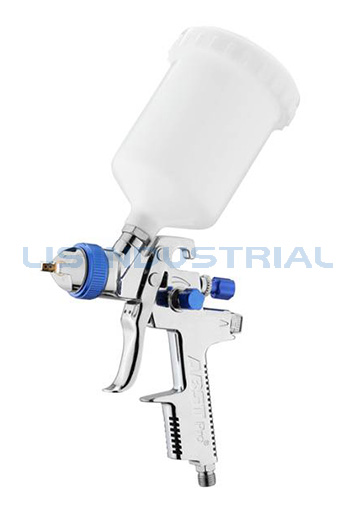
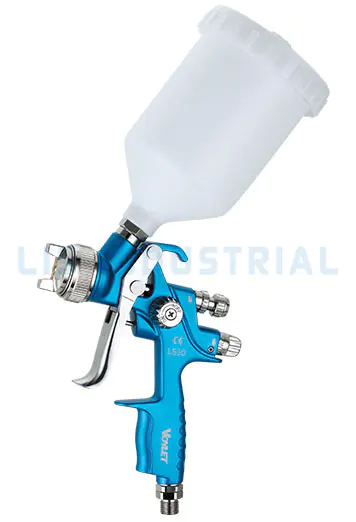
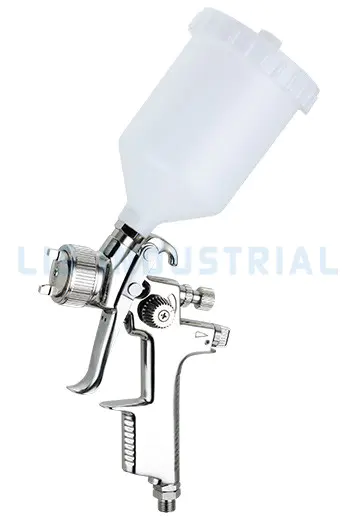
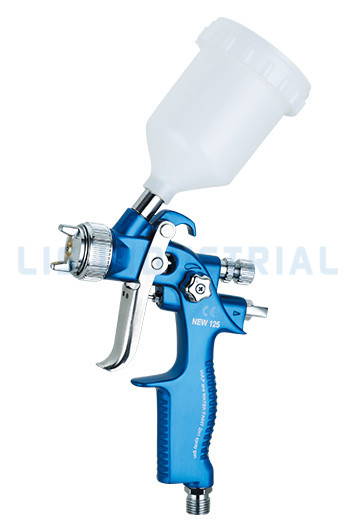
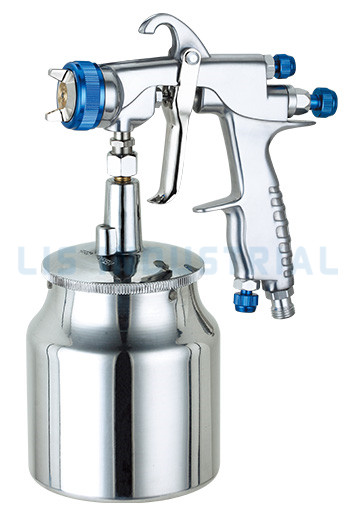
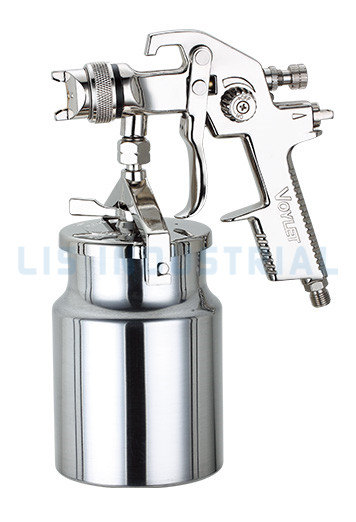
The Gravity Feed high volume low pressure Spray Gun design — where the paint cup sits on top of the gun — is the most popular configuration among professional finishers because gravity assists material flow, reduces air pressure demand, and allows the cup to be drained more completely, minimizing waste.
| Table 1: Spray gun type comparison by pressure, efficiency, and application | |||
| Spray Gun Type | Operating Pressure | Transfer Efficiency | Best For |
| Conventional | 40–60 PSI | 25–40% | High-production industrial |
| HVLP Gravity Feed | 10–29 PSI | 65–85% | Automotive, furniture, detail work |
| HVLP Pressure Feed | 10–25 PSI | 70–80% | Large surface, high-viscosity coatings |
| LVLP | 10–25 PSI | 65–75% | Low-CFM compressors, hobby use |
Choosing the Right Nozzle Size for Your Material
Nozzle (fluid tip) size is the single most important specification to match to your coating material. Using a tip that is too small forces you to thin the material excessively; too large and you lose atomization quality. Here are the standard guidelines:
- 1.0–1.2mm: Lacquers, stains, dyes, sealers, and thin waterborne coatings
- 1.3–1.4mm: Automotive base coats, single-stage urethanes, medium-viscosity primers
- 1.5–1.7mm: High-build primers, thick enamels, epoxy primers
- 1.8–2.5mm: Texture coatings, heavy-bodied materials, underbody coatings
For an Automotive HVLP Paint Spray Gun used on clear coats, a 1.3mm or 1.4mm tip is the industry standard. Clear coat is typically medium-viscosity and demands fine atomization to achieve the mirror-like depth that automotive finishing requires.
Thinning Your Paint to the Correct Viscosity
Incorrect viscosity is responsible for the majority of spray defects — orange peel, runs, dry spray, and poor flow-out. Most HVLP systems spray best when the material flows through a No. 4 Ford viscosity cup in 20–30 seconds. Here is how to approach thinning by material type:
Solvent-Based Coatings
Add reducer or thinner in small increments — typically 5–15% by volume. Always use the manufacturer's recommended reducer for the ambient temperature. Using a fast reducer in warm conditions causes dry spray; a slow reducer in cold conditions causes runs and extended flash times.
Waterborne Coatings
Waterborne paints often require little or no thinning, but humidity and temperature affect flow significantly. In low-humidity environments (below 40% RH), add 5–10% distilled water to improve atomization. Never use tap water — mineral content can cause adhesion problems.
Quick Viscosity Test Without a Cup
Dip a stir stick into the material and lift it. Paint that forms a continuous stream for 2–3 seconds before breaking into droplets is approximately in the correct range for most HVLP systems. This is not a substitute for a viscosity cup in professional settings but works as a fast field check.
Setting Up Your HVLP Spray Gun: Step-by-Step
A Professional HVLP Spray Gun Set will typically include the gun body, multiple fluid tips, an air cap wrench, cleaning brushes, and a spanner. Before spraying, follow this sequence:
- Install the correct fluid tip and needle for your material
- Set the compressor regulator to the gun's recommended inlet pressure — typically 40–50 PSI at the gun inlet for most gravity feed HVLP models
- Open the fan control knob fully, then back off the fluid needle adjustment to approximately 2.5 turns open
- Fill the cup to no more than 80% capacity to prevent spills when tilting
- Spray a test pattern on cardboard — the ideal fan shape is an even, elliptical pattern with no heavy edges or center concentration
- Adjust fan width and fluid flow based on the test pattern result before moving to the workpiece
Never skip the test pattern step. A two-minute test saves hours of sanding and recoating.
Spray Technique: Distance, Speed, and Overlap
Technique accounts for as much as 40% of the final finish quality, even with a correctly set-up gun. Three variables control everything:
Gun Distance
Hold the Gravity Feed high volume low pressure Spray Gun at 6–8 inches (15–20cm) from the surface for automotive and furniture work. Moving closer increases film build and risk of runs; moving further causes dry spray and texture. Keep this distance consistent throughout each pass — arcing the gun (pivoting from the wrist) changes the distance and creates uneven film thickness.
Travel Speed
Move at approximately 12–18 inches per second for most automotive coatings. Moving too slowly deposits excessive material; too fast creates thin coverage and dry film. Develop a consistent rhythm — many experienced finishers count silently to maintain even speed across passes.
Overlap
Overlap each pass by 50%. This means each new stroke covers half of the previous stroke. A 50% overlap ensures even film build without thin streaks or heavy bands. Trigger the gun before the edge of the panel and release after — never start or stop the trigger directly over the workpiece surface.
Most Common HVLP Finish Defects and Primary Cause Category
Figure 1: Percentage of refinishers reporting each defect type as a recurring issue (industry survey data)
Air Supply Requirements You Cannot Ignore
An HVLP spray gun requires high air volume — typically 8–14 CFM (cubic feet per minute) at operating pressure. Most small hobby compressors (1–3 gallon tank) cannot sustain this volume, resulting in pressure drop mid-stroke and an uneven finish.
For consistent results with a Professional HVLP Spray Gun Set:
- Minimum compressor rating: 5 HP with a 60-gallon or larger tank for uninterrupted spraying
- Air delivery at gun: Verify CFM at the operating PSI — not the compressor's peak CFM rating
- Hose diameter: Use a minimum 3/8" internal diameter hose; 1/4" hose restricts flow by up to 40%
- Moisture separator: Always use an inline water trap and desiccant filter — moisture in the air line causes fish eye craters and adhesion failure
- Hose length: Each 25 feet of hose causes a measurable pressure drop; compensate by increasing regulator pressure slightly
CFM Air Demand vs. Fluid Tip Size
Figure 2: Approximate CFM air consumption increases significantly with larger nozzle diameters
How to Spray Automotive Panels with an HVLP Gun
The Automotive HVLP Paint Spray Gun workflow differs from furniture or general coating applications in one key way: panel preparation and coat sequencing are as important as spraying technique itself.
Stage 1 — Surface Preparation
Sand to 400-grit before primer, clean with a wax and grease remover, and wipe with a tack cloth immediately before spraying. Any contamination left on the surface will show through the final clear coat.
Stage 2 — Primer Application
Apply 2–3 medium coats of primer with 10–15 minute flash time between coats. Block sand dry primer to 600-grit before base coat. This stage determines the smoothness of your final finish — do not rush it.
Stage 3 — Base Coat
Apply 2–3 coats of base coat, allowing each coat to flash (surface goes dull, approximately 5–10 minutes) before the next. Base coat does not need to be perfectly smooth — it will be buried under clear. Focus on even color coverage.
Stage 4 — Clear Coat
Apply 2 medium-wet coats of clear, then one final wet coat for maximum gloss. The wet coat is where finish quality is made or lost. Move slightly slower and hold slightly closer (6 inches) to lay down a wetter, self-leveling film. Allow full cure before wet sanding or polishing — typically 24 hours minimum for urethane clears.
Cleaning Your HVLP Spray Gun After Every Use
A gun not cleaned immediately after use is a gun being destroyed. Dried paint in the fluid passages and needle packing is the leading cause of premature HVLP gun failure. The cleaning sequence:
- Empty remaining paint from the cup back into the can
- Add 50–100ml of appropriate solvent (lacquer thinner for solvent-based, warm water for waterborne) to the cup
- Spray the solvent through the gun until it runs clear
- Remove the fluid tip, needle, and air cap; soak in solvent for 5 minutes
- Use the included cleaning brushes to clear all orifices — never use metal picks or wire, which damage precision-machined surfaces
- Dry all components completely before reassembly; store with a drop of gun oil on the needle packing
A properly cleaned HVLP gun can deliver consistent performance for 10+ years in professional use. Neglecting cleaning causes tip wear, needle scoring, and air cap blockage — all of which degrade finish quality and require costly replacement parts.
Troubleshooting Common HVLP Finish Problems
| Table 2: Common HVLP spray defects, causes, and corrective actions | ||
| Defect | Likely Cause | Fix |
| Orange peel texture | Too little reducer / too high pressure / too fast movement | Thin material, reduce pressure, slow down travel speed |
| Runs and sags | Too much fluid / too close / too slow / too many coats | Reduce fluid knob, increase distance, speed up pass |
| Dry, sandy spray | Too much pressure / too far / material too thick | Lower pressure, move closer, thin material slightly |
| Fish eyes (craters) | Silicone, oil, or moisture contamination | Clean surface, add moisture separator to air line |
| Spitting / pulsing | Blocked fluid tip or loose needle packing | Clean tip; check and tighten needle packing nut |
| Heavy center / thin edges | Blocked air cap horn holes | Soak and clean air cap thoroughly |
About Ningbo Lis Industrial Co., Ltd.
Ningbo Lis Industrial Co., Ltd. is an advanced HVLP Spray Gun manufacturer and gravity feed spray gun factory based in China. All products have passed internationally recognized certificates including CE and GS, reflecting the company's commitment to safety and performance standards.
Lis has always pursued the highest standards for product quality, backed by a strong R&D team capable of delivering OEM, ODM, and custom manufacturing solutions — from customer-supplied drawings and samples through to fully developed product lines. Air and pneumatic HVLP spray guns are available in customizable configurations to match specific application and market requirements.
With a worldwide marketing and service network firmly established, Lis products are widely sold into Europe, North America, the Middle East, South Africa, and East Asia, with strong, lasting business relationships developed across all these regions. Whether you require a single-model order or large-volume OEM production, Lis delivers the manufacturing capability and quality assurance to support your business.