Search
 English
 中文简体
中文简体 Deutsch
 Español
Content
- 1 Understanding HVLP Spray Guns Before Setup
- 2 Step-by-Step: How to Set Up a Paint Gun
- 3 Air Pressure Settings for Different Paint Types
- 4 Choosing the Right Nozzle Size for Your Application
- 5 Air Compressor Requirements for Paint Guns
- 6 Troubleshooting Common Spray Pattern Problems
- 7 About Ningbo Lis Industrial: HVLP Spray Gun Manufacturer
- 8 Cleaning and Maintaining Your Paint Spray Gun
- 9 Frequently Asked Questions
Setting up a paint gun correctly is the single most important factor in achieving a smooth, even finish — whether you are spraying automotive clear coat, furniture lacquer, or exterior latex. The short answer: connect your air supply, set the regulator to the manufacturer's recommended inlet pressure (typically 29–50 PSI for HVLP spray guns), install the correct fluid nozzle and needle, adjust the fan, fluid, and air control knobs, then test on a scrap panel before moving to your workpiece. The following guide walks through every step in detail, covering gun types, air pressure settings, nozzle selection, and common troubleshooting scenarios.
Whether you are working with an HVLP spray gun, a conventional air spray gun, or a pressure pot spray gun for high-volume production, the setup principles are consistent: match the air pressure to the gun type, thin the paint to the correct viscosity, and dial in the three control knobs before committing to the final surface. Getting these steps right eliminates the most common finishing defects — runs, orange peel, dry spray, and fisheye — before they happen.
Most Common Paint Gun Setup Mistakes (% of reported finish defects)
Incorrect air pressure for spray painting is responsible for over one-third of all finish defects reported by professional painters, making it the most critical variable to get right during setup. Paint viscosity issues — usually caused by insufficient thinning or over-thinning — are the second most common problem, contributing to runs and dry-spray patterns respectively. Addressing these two variables alone eliminates more than 60% of avoidable finishing problems before a single trigger pull on the final surface.
Understanding HVLP Spray Guns Before Setup
A high volume low pressure paint sprayer (HVLP) atomizes paint using a large volume of air delivered at low pressure — typically 2–10 PSI at the air cap, compared to 40–60 PSI for conventional guns. This design dramatically improves transfer efficiency: HVLP guns deliver 65–90% of paint onto the surface versus 30–40% for conventional spray systems. The result is less overspray, reduced material waste, lower VOC emissions, and a significantly cleaner working environment.
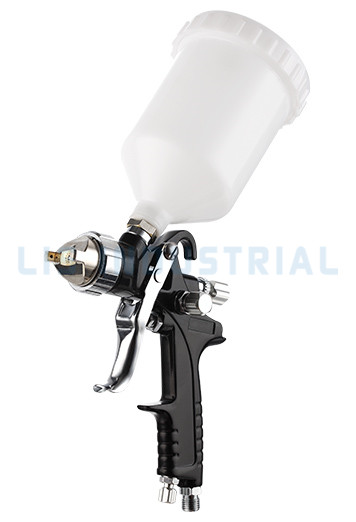
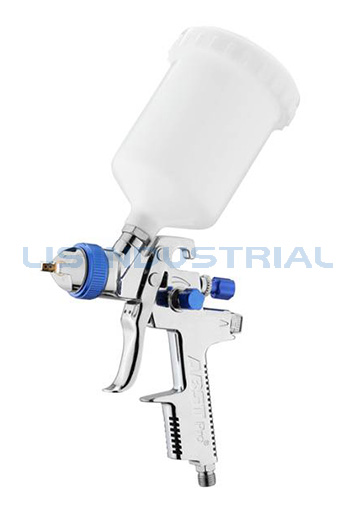
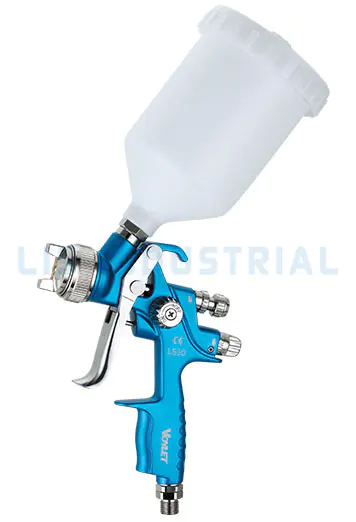
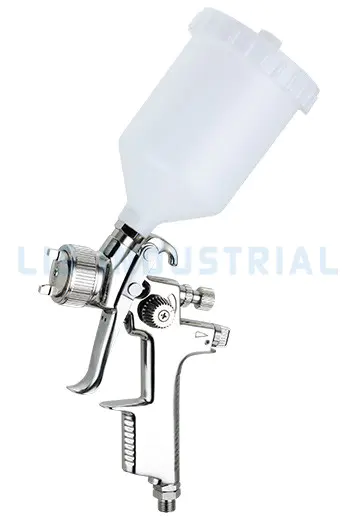
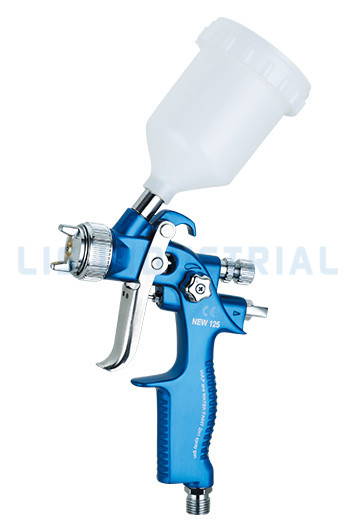
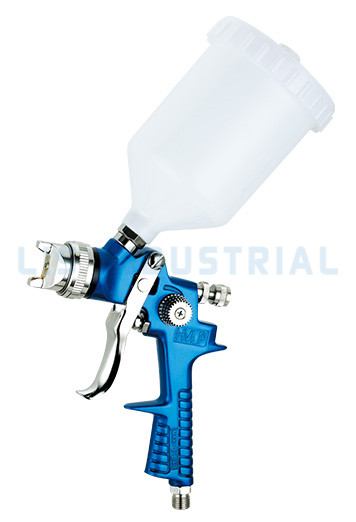
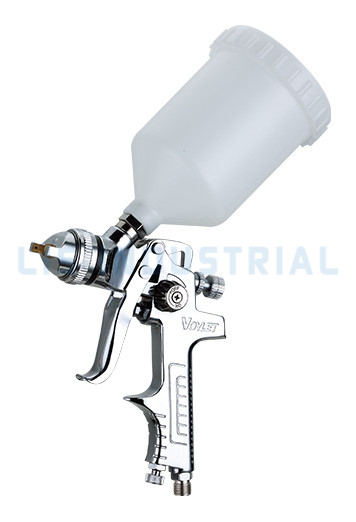
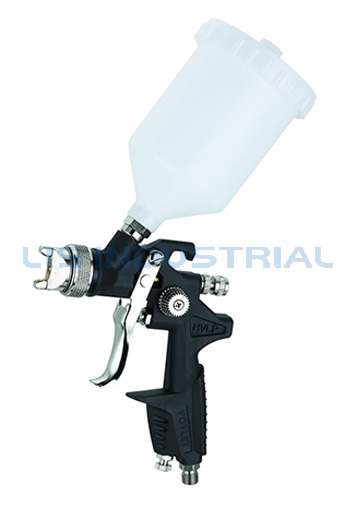
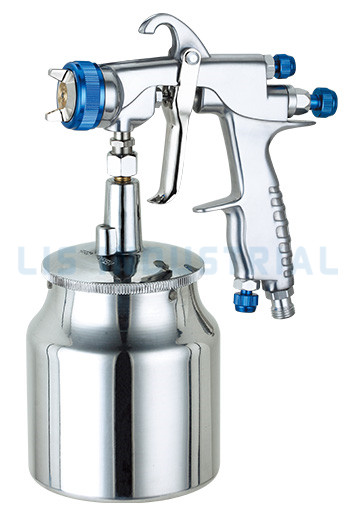
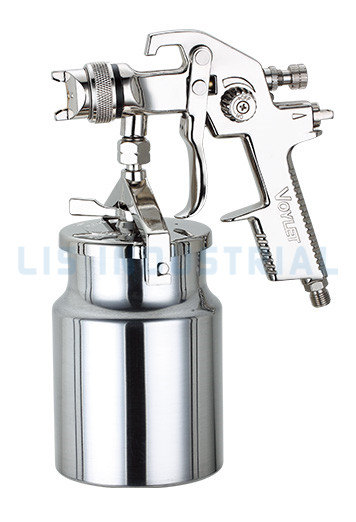
HVLP spray guns come in two primary feed systems. A gravity feed spray gun places the paint cup on top of the gun body, using gravity to deliver paint to the nozzle — ideal for small jobs, color changes, and fine finishing work where material economy is important. A suction feed gun draws paint up from a bottom-mounted cup using air venturi effect, working well with thinner materials. For high-volume production environments, a pressure pot spray gun separates the fluid supply into a pressurized tank, allowing continuous spraying without refilling and consistent fluid delivery regardless of gun angle.
HVLP vs. Conventional vs. Airless: Key Differences
| Parameter | HVLP Spray Gun | Conventional Air Gun | Airless Sprayer |
|---|---|---|---|
| Air Cap Pressure | 2–10 PSI | 40–60 PSI | N/A (hydraulic) |
| Transfer Efficiency | 65–90% | 30–40% | 40–60% |
| Finish Quality | Excellent | Excellent | Good |
| Best For | Auto, furniture, fine finish | Industrial, high-build coatings | Large surfaces, thick coatings |
| Overspray Level | Low | High | Medium–High |
Step-by-Step: How to Set Up a Paint Gun
Following a structured setup sequence prevents the most common errors and ensures consistent results from the first spray pass. Each step below builds on the previous one — skipping ahead is a reliable way to waste material and time.
Step 1: Assemble and Inspect the Gun
Before connecting any air supply, inspect the gun body, fluid needle, nozzle, and air cap for damage, wear, or dried paint residue. A partially blocked nozzle orifice is one of the leading causes of uneven fan patterns and spit marks. Install the correct nozzle and needle combination for your material — 1.2–1.4 mm tip for basecoats and clear coats, 1.4–1.6 mm for primers, and 1.7–2.0 mm for high-viscosity materials like latex and epoxy.
Step 2: Connect and Set the Air Supply
Connect the gun to a filtered, regulated air supply using a properly sized hose — minimum 3/8-inch ID for HVLP guns requiring 6–14 CFM. Install an inline paint spray gun pressure regulator at the gun handle or within 12 inches of the gun inlet. A water separator is strongly recommended to prevent moisture contamination in the finish. Set the inlet pressure per the gun manufacturer's specification: most HVLP gravity feed guns operate at 29–40 PSI inlet pressure to achieve the correct low air cap pressure.
Step 3: Prepare and Load the Paint
Thin the paint to the correct viscosity using the recommended thinner or reducer. Use a viscosity cup — most automotive basecoats should flow through a No. 4 Ford cup in 14–18 seconds; primers typically 18–25 seconds. Strain all paint through a fine mesh (125-micron or finer) before loading the cup to remove skin, clumps, or debris. Fill a gravity feed cup to no more than 80% capacity to prevent spills during angle changes.
Step 4: Adjust the Three Control Knobs
All spray gun machines feature three primary adjustment controls. Start with all knobs at their midpoint settings and refine from there on a test panel:
- Fan Width Control (top knob): Adjusts the horizontal spread of the spray pattern from round (fully closed) to a wide ellipse (fully open). For panel work, a fully open fan 12–14 inches wide is standard. For detail work or jambs, reduce fan width to 4–6 inches.
- Fluid Control (middle knob): Limits how far the needle retracts when the trigger is pulled, controlling paint volume per pass. Back out 1.5–2 full turns from fully closed as a starting point. Too much fluid causes runs; too little causes dry, grainy texture.
- Air Pressure / Atomization Control (bottom knob): Fine-tunes the air volume reaching the air cap to balance atomization against transfer efficiency. Increase for finer atomization with high-viscosity materials; decrease slightly to reduce overspray with thin materials.
Step 5: Test Spray and Evaluate the Pattern
Hold the gun 6–8 inches from a test surface and apply a single trigger pull for 1–2 seconds. Evaluate the resulting pattern: a correct HVLP pattern is a smooth, even ellipse with soft edges and consistent density from top to bottom. Heavy ends (a bone or figure-eight shape) indicate the fan pressure needs adjustment. A split fan (heavy in the center with thin sides) indicates low fluid pressure or blocked air horn holes. A banana or crescent shape indicates a partial needle or nozzle blockage.
Paint Gun Setup Sequence — Time Investment per Step (minutes)
Paint preparation — thinning, straining, and viscosity testing — demands the most time in the setup sequence, typically 6–10 minutes for a professional. This investment pays dividends in finish quality: properly thinned material prevents the vast majority of blockages and pattern defects. The full setup sequence from inspection to first test pass should take approximately 20–25 minutes for an experienced user, a small time cost compared to the hours needed to sand back and re-spray a defective panel.
Air Pressure Settings for Different Paint Types
Spray gun pressure for painting is not a fixed number — it varies with the material being applied, the nozzle size, and the desired finish quality. Using a single pressure setting for all materials is a common mistake made by beginners that leads to inconsistent results. The table below provides practical starting-point pressure ranges for the most common coatings applied with HVLP and conventional spray guns.
| Table 2: Recommended inlet pressure ranges by material type for HVLP spray guns | |||
| Material | Inlet PSI (HVLP) | Nozzle Size (mm) | Viscosity (Ford #4 cup, sec) |
| Automotive Basecoat | 26–29 PSI | 1.2–1.4 | 14–18 |
| Clear Coat | 29–35 PSI | 1.3–1.5 | 16–22 |
| Primer / Filler | 29–40 PSI | 1.4–1.8 | 18–28 |
| Spraying Latex Paint | 40–50 PSI | 1.7–2.0 | 25–40 |
| Lacquer / Stain | 20–28 PSI | 1.0–1.3 | 12–16 |
When spraying latex paint, note that standard HVLP guns may struggle with undiluted latex due to its high viscosity. Thinning latex by 10–15% with water is often necessary to achieve proper atomization. Some professional painters prefer a dedicated low pressure paint sprayer with a larger 1.8–2.0 mm nozzle and higher CFM turbine for latex applications, as this combination delivers better atomization without excessive thinning that can compromise coverage and washability.
Transfer Efficiency vs. Air Cap Pressure — HVLP vs. Conventional Gun (%)
This chart illustrates why HVLP spray guns operate at low air cap pressures: transfer efficiency peaks in the 2–10 PSI range and declines significantly as pressure rises due to increased overspray atomization. Conventional guns achieve their best (but still much lower) efficiency around 30–40 PSI. The practical implication is clear: operating an HVLP gun at higher-than-recommended pressure wastes material and generates unnecessary overspray, while operating too low can result in poor atomization and orange-peel texture.
Choosing the Right Nozzle Size for Your Application
Nozzle selection is one of the most impactful decisions in paint gun setup. An undersized nozzle with a thick paint will clog repeatedly and produce a dry, textured finish; an oversized nozzle with thin paint will flood the surface, causing runs and sags. The fluid nozzle (tip), fluid needle, and air cap must all be matched as a set — mixing components from different sets causes pattern and atomization inconsistencies.
A 1.3 mm nozzle is the most versatile size for professionals, handling automotive basecoat, clear coat, stains, and solvent-based enamels with good atomization. Moving to a 1.8 mm nozzle opens the gun up to water-based paints, latex, and polyurethane sealers that cannot be adequately thinned without compromising performance. For specialized applications like high-build epoxy primers or anti-corrosion coatings, a 2.0 mm or larger tip is necessary to prevent constant blockages.
Nozzle Size Suitability Radar — 1.3mm vs 1.8mm vs 2.0mm
The radar chart confirms that no single nozzle size excels across all paint types. The 1.3 mm tip dominates for automotive coatings, lacquers, and fine detail work where fine atomization is critical. The 1.8 mm tip is the balanced choice for water-based paints and primers, striking a practical middle ground across most common applications. The 2.0 mm tip specializes in high-viscosity coatings and heavy primers, where its large orifice prevents clogging that would quickly halt production with a smaller nozzle.
Air Compressor Requirements for Paint Guns
One of the most overlooked aspects of paint gun pressure management is the air compressor's ability to sustain adequate CFM (cubic feet per minute) delivery. A gun that performs beautifully for the first 30 seconds may produce a starved, sputtering pattern as the compressor pressure drops during sustained spraying. Matching compressor output to gun consumption is a fundamental requirement.
As a practical guideline: HVLP spray guns require 6–14 CFM at 40 PSI depending on gun size and nozzle diameter. A small 6-CFM compressor may support a 1.3 mm HVLP gun for light touch-up work, but a 1.8 mm gun spraying latex or primer requires a compressor producing 10–14 CFM continuously — typically a 60-gallon or larger tank with a 3+ HP motor. Undersized compressors cause pressure fluctuations that are directly visible as banding or inconsistent fan density in the applied film.
For production environments where multiple spray gun machines operate simultaneously, or where a pressure pot spray gun delivers continuous high-volume output, a dedicated shop compressor with an output of 20–30 CFM and a 120-gallon receiver tank is the practical minimum. Installing an inline spray gun regulator at each gun position allows individual pressure adjustment without affecting other stations on the same air manifold.
Troubleshooting Common Spray Pattern Problems
Recognizing and correcting spray pattern defects quickly is a key skill for any professional using a painting spray gun. Most defects are self-diagnosing when you know what to look for on the test panel.
- Heavy Ends (Bone Pattern): Fan pressure too high relative to fluid; reduce fan air pressure or increase fluid output slightly. Also caused by a worn or bent air cap horn.
- Split Fan (Figure-Eight): Air pressure too high or fluid pressure too low. Reduce air cap pressure, open fluid knob half a turn, or thin the paint further. Check for a partial blockage in one of the air horn holes.
- Round Pattern When Fan Should Be Elliptical: Fan width knob fully closed, or fan air ports blocked with dried paint. Check and clean the air cap fan holes with a wooden toothpick — never use metal tools that can damage the precision orifices.
- Spitting / Intermittent Paint: Most often caused by a loose fluid needle packing, a cracked fluid cup seal, or air leaking into the fluid path. Check all seal points and replace any damaged O-rings.
- Runs and Sags: Fluid volume too high, gun speed too slow, or gun held too close to the surface. Reduce fluid knob by half a turn, increase gun travel speed to 12–16 inches per second, and maintain a consistent 6–8 inch gun-to-surface distance.
- Orange Peel Texture: Paint too thick, air pressure too low, or gun too far from the surface. Thin the material by an additional 5–10%, increase inlet pressure by 3–5 PSI, or reduce gun distance by 1–2 inches.
About Ningbo Lis Industrial: HVLP Spray Gun Manufacturer
Ningbo Lis Industrial Co., Ltd. is an advanced China HVLP spray gun manufacturer and HVLP gravity feed spray gun factory, holding CE and GS product certifications. With a strong in-house R&D team, Lis offers full OEM and ODM services — accepting custom orders based on customer-supplied drawings, samples, or application requirements. This flexibility makes Lis a preferred manufacturing partner for distributors and equipment companies requiring customized air pressure sprayer solutions for specific markets.
Lis products are distributed globally across Europe, North America, the Middle East, South Africa, and East Asia, underpinned by an established worldwide marketing and service network. The company's air and pneumatic HVLP spray gun range covers professional automotive refinishing, industrial coating, and fine woodworking applications, with full customization available on fan pattern size, nozzle configuration, cup capacity, and coil material. Product quality is treated as the cornerstone of market competitiveness — every gun undergoes rigorous dimensional and function testing before dispatch.
Lis Industrial — Global Export Market Distribution (%)
Europe and North America together represent 63% of Lis Industrial's export volume, reflecting strong demand from professional automotive refinishing, furniture manufacturing, and general industrial coating sectors in these regions. East Asian markets account for 18%, driven by manufacturing OEM partnerships and after-market tool distribution. Continued growth in Middle Eastern and African markets reflects increasing adoption of professional pneumatic finishing tools in these developing industrial economies.
Cleaning and Maintaining Your Paint Spray Gun
A spray gun that is properly maintained after every use will deliver consistent performance for years. Dried paint inside the fluid passages is the primary cause of blockages, erratic patterns, and seal damage — all of which are entirely preventable with a disciplined cleaning routine.
- Immediate Solvent Flush: As soon as spraying is complete, empty the cup and spray the appropriate solvent (lacquer thinner for solvent-based, water for water-based) through the gun until it runs clear from the nozzle. This step must happen before the paint has any chance to dry inside the passages.
- Disassemble the Air Cap and Nozzle: Remove the air cap, fluid nozzle, and needle. Soak in the appropriate solvent for 10–15 minutes. Use a soft brush to clean all surfaces — never use metal picks or wire inside fluid passages. Use a wooden toothpick to clear air cap orifices.
- Clean the Fluid Cup and Passages: Brush clean the inside of the fluid cup and thread area. Spray a final flush of clean solvent through the gun body to clear the internal fluid channel and needle packing area.
- Lubricate Moving Parts: Apply a single drop of light machine oil to the needle packing, spring, and trigger pivot after each cleaning session. This prevents the packing from drying out and cracking, which is a common cause of air leakage into the fluid stream.
- Inspect Seals and O-rings: During regular deep-clean sessions (every 20–30 uses), inspect all rubber seals and O-rings for hardening, cracking, or swelling from solvent exposure. Replace any compromised seals with OEM-spec components to maintain leak-free performance.
Frequently Asked Questions
Q1: What is a paint gun?
A paint gun (spray gun) is a pneumatic or airless tool that atomizes liquid paint into fine droplets and projects them onto a surface as a controlled spray pattern. Air-powered models connect to a compressor; HVLP variants use high air volume at low pressure to maximize transfer efficiency and minimize overspray.
Q2: How does a paint gun work?
Pulling the trigger opens the fluid needle, allowing paint to flow to the nozzle orifice. Simultaneously, compressed air exits the air cap ports and meets the fluid stream, breaking it into fine atomized droplets that form the spray pattern. Fan-shaped patterns are created by air horn holes on each side of the air cap directing additional air to flatten and widen the spray ellipse.
Q3: What is the difference between a paint gun and a paint sprayer?
A paint gun typically refers to a professional pneumatic spray gun requiring a separate air compressor. A paint sprayer often describes a self-contained unit with a built-in turbine or pump. Professional air-powered spray guns offer superior atomization and finish quality; consumer paint sprayers prioritize ease of use and portability for DIY tasks.
Q4: What are the benefits of using a paint gun?
Paint guns deliver faster coverage than brush or roller methods, produce a smoother factory-quality finish, reduce brush marks and lap lines, and allow precise control over film thickness. HVLP models also reduce material waste by up to 40% versus conventional spray, cutting both material costs and environmental impact over time.
Q5: Which paint gun is best for beginners?
A gravity feed HVLP spray gun with a 1.4 mm nozzle is widely recommended for beginners. The gravity feed design uses less air pressure and wastes less material, while the 1.4 mm nozzle handles both primers and topcoats without frequent changes. Start with water-based paints for easier cleanup while learning gun technique and pressure settings.
Q6: What nozzle size should I use?
Use 1.2–1.4 mm for automotive basecoats, clear coats, and stains; 1.4–1.6 mm for primers and sealers; 1.7–2.0 mm for latex, thick enamels, and epoxy coatings. When in doubt, start with a 1.4 mm tip — it is the most versatile size for general refinishing and covers the widest range of common coating viscosities.
Q7: What air compressor size is needed for a paint gun?
Most HVLP spray guns require 6–14 CFM at 40 PSI. For light touch-up work, a compressor producing 6 CFM with a 20-gallon tank may suffice. For continuous panel spraying, a 3+ HP compressor with a 60-gallon tank delivering 10–14 CFM sustained is the practical minimum to avoid pressure drop-off during long spray passes.
Q8: What is the best paint gun for automotive painting?
For automotive refinishing, a professional HVLP gravity feed spray gun with a 1.3–1.4 mm fluid tip is the industry standard for basecoat and clear coat application. Look for a gun with a precision-machined stainless steel nozzle and needle, a large fan pattern (up to 12 inches), and a comfortable balanced body with a smooth trigger pull for consistent coverage across large panels.
Q9: How do I adjust a paint sprayer for the right pressure?
Set the inlet pressure using an inline spray gun pressure regulator at the recommended starting value (typically 29–40 PSI for HVLP). Spray a test pattern and look for even, soft-edged ellipse coverage. If the pattern shows heavy ends, reduce pressure slightly. If atomization is coarse or grainy, increase pressure by 2–3 PSI. Dial in 2–3 PSI increments rather than large adjustments to find the optimum setting for each material.
Q10: How do I choose a paint gun for spraying latex paint?
For spraying latex paint, choose an HVLP or low pressure paint sprayer with a 1.8–2.0 mm fluid tip and a high-CFM air supply (10+ CFM). Latex requires larger orifices due to its higher viscosity, even after thinning. A pressure pot spray gun is an excellent option for large-volume latex applications, as it delivers consistent fluid pressure regardless of how full the paint reservoir is.