Search
 English
 中文简体
中文简体 Deutsch
 Español
Content
- 1 Why Does Air Pressure Matter So Much for Air Brush Painting on Miniatures?
- 2 What’s the General Range of Air Pressure for Miniature Air Brush Painting?
- 3 How Does the Type of Miniature Painting Task Affect Air Pressure Choice?
- 4 What Role Does Paint Type and Thickness Play in Air Pressure Settings?
- 5 What Tools Do You Need to Measure and Adjust Air Pressure Precisely?
- 6 What Common Mistakes Should Be Avoided When Setting Air Pressure for Miniature Air Brushing?
Why Does Air Pressure Matter So Much for Air Brush Painting on Miniatures?
Miniatures—whether tabletop game figures, scale models, or collectible figurines—require ultra-fine detail work, and air pressure directly determines how paint adheres, spreads, and preserves those details. Too high pressure can atomize paint into overly fine particles that “spatter” (creating a grainy finish) or blow away small details like tiny facial features or delicate armor edges. It can also force paint into crevices (e.g., between a miniature’s fingers or weapon grooves) where it shouldn’t go, muddying the design.
Too low pressure, on the other hand, leads to thick, uneven paint application. The paint may not atomize properly, leaving “blotches” or “tide marks” as it dries, and it won’t flow smoothly over curved surfaces (like a miniature’s torso or helmet). For example, when painting a 28mm tabletop figure’s eyes—one of the smallest details—even a 5 PSI (pounds per square inch) difference can mean the difference between a sharp, realistic eye and a smudged mess. In short, air pressure is the “control knob” for precision in miniature air brushing; getting it right ensures details stay crisp, paint layers are thin (critical for layering colors), and the final finish looks professional.
What’s the General Range of Air Pressure for Miniature Air Brush Painting?
For most miniature air brushing tasks, the ideal air pressure falls between 10–30 PSI—but this range narrows further based on the specific task (e.g., base coating vs. detail work) and the type of paint used.
Beginners often start with a “safe middle ground” of 15–20 PSI for general work, as this balances atomization (to avoid spattering) and paint flow (to avoid thick layers). However, this range isn’t one-size-fits-all: smaller miniatures (e.g., 10mm scale military models) or finer details (e.g., writing on a miniature’s shield) may need lower pressure, while larger surfaces (e.g., a 75mm figure’s cloak) or thicker paints (e.g., metallic or textured paints) may require slightly higher pressure.
It’s also important to note that this range is significantly lower than air pressure used for larger projects (e.g., 40–60 PSI for painting furniture or car parts). Miniatures’ small size and delicate details demand gentler pressure—think of it as “mist” rather than “spray” to avoid overwhelming the surface.
How Does the Type of Miniature Painting Task Affect Air Pressure Choice?
Different stages of miniature painting require tailored air pressure to match the task’s precision needs. Here’s how to adjust based on common tasks:
1. Base Coating (Applying the First Layer of Paint)
Base coating involves covering large areas of the miniature (e.g., a figure’s body, a tank’s hull) with a single, even color. Since the goal is coverage (not fine detail), pressure can be slightly higher: 18–25 PSI. This ensures the paint atomizes well enough to cover the surface quickly without leaving streaks, but not so high that it blows away small raised details (e.g., a belt buckle on a figure). For example, when base coating a 40mm fantasy figure’s armor, 20 PSI will help the paint flow smoothly over the armor’s curves without pooling in gaps.
2. Detail Work (Eyes, Symbols, Small Features)
Detail work is the most pressure-sensitive task—even small pressure spikes can ruin tiny details. For painting eyes, symbols (e.g., a faction logo on a shield), or thin lines (e.g., a sword’s edge), use 10–15 PSI. Lower pressure gives you more control: the paint flows slowly and precisely, allowing you to “trace” small shapes without overspray. For instance, painting a 28mm figure’s eye (which may be just 1–2mm wide) requires 12–13 PSI—any higher, and the paint will spread beyond the eye’s outline, creating a “puffy” or smudged look.
3. Layering and Blending (Building Up Color Gradients)
Layering (applying thin, transparent layers to deepen color) and blending (transitioning between colors, e.g., from dark blue to light blue on a cape) need balanced pressure to keep layers thin but even: 14–18 PSI. Too low, and the paint won’t spread enough to blend; too high, and it will mix the colors too aggressively (muddying the gradient). For example, blending a sunset gradient on a miniature’s cloak requires 16 PSI—this lets you apply thin layers of orange, pink, and purple that merge smoothly without overlapping into a brown mess.
4. Weathering or Texturing (Adding Rust, Dirt, or Texture)
Weathering (e.g., adding rust to a tank’s metal parts) or texturing (e.g., creating a “rough stone” look on a castle wall) often uses thicker paints or additives (e.g., texture medium). To push these thicker materials through the air brush without clogging, use 22–30 PSI. Higher pressure helps atomize the thicker paint, ensuring it adheres as small “dots” (for rust) or a rough surface (for stone) instead of clumping. For example, adding dirt to a miniature’s boots with a textured paint works best at 25 PSI—this sprays the paint in fine, gritty particles that look like real dirt.
What Role Does Paint Type and Thickness Play in Air Pressure Settings?
Paint consistency (thickness) and type directly impact how well it atomizes at different pressures—ignoring this can lead to clogging, spattering, or uneven finishes. Here’s how to adjust pressure based on paint properties:
1. Acrylic Paints (Most Common for Miniatures)
Acrylic paints are water-based and the go-to for miniatures, but their thickness varies by brand (e.g., Vallejo Model Color vs. Citadel Contrast Paint) and dilution.
- Thin, diluted acrylics (mixed with 10–20% water or air brush thinner): Use 12–18 PSI. Diluted paint flows easily, so lower pressure prevents overspray. For example, diluted Vallejo Game Color (used for layering) works best at 15 PSI—higher pressure would turn it into a mist that doesn’t stick well.
- Thick acrylics (undiluted or lightly thinned, e.g., Citadel Base Paint): Use 18–22 PSI. Thicker paint needs more pressure to atomize, but avoid going above 25 PSI—this can cause the paint to “dry in the air” (called “dry spray”) before hitting the miniature, leaving a grainy finish.
2. Enamel or Lacquer Paints (For Durable Finishes)
Enamel and lacquer paints are oil-based and thicker than acrylics, requiring higher pressure to atomize. They’re often used for metal miniatures (e.g., 1:64 scale cars) where durability is key.
- Enamel paints: Use 20–25 PSI. Enamels dry slowly, so higher pressure helps them spread evenly without pooling. For example, painting a metal tank’s hull with enamel requires 22 PSI to ensure the paint covers smoothly and bonds to the metal.
- Lacquer paints: Use 25–30 PSI. Lacquers are even thicker than enamels and dry quickly, so maximum pressure (within the miniature range) is needed to atomize them before they dry. However, work in a well-ventilated area—lacquers emit strong fumes.
3. Specialty Paints (Metallics, Fluorescents, Textures)
Specialty paints have unique properties that demand pressure tweaks:
- Metallic paints (e.g., gold, silver): Use 18–22 PSI. Metallic particles are heavier than regular paint pigments, so slightly higher pressure helps them spread evenly without clumping. Too low, and the particles will settle in one spot, creating a “patchy” metallic sheen.
- Fluorescent paints: Use 15–18 PSI. Fluorescents are thin and prone to fading if applied too thick—lower pressure keeps layers light, preserving their brightness.
- Texture paints (e.g., “mud” or “snow” mediums): Use 25–30 PSI. These thick, gritty paints need high pressure to spray as small particles (for texture) instead of blobs.
What Tools Do You Need to Measure and Adjust Air Pressure Precisely?
To get consistent, accurate air pressure for miniature painting, you’ll need a few key tools—most of which are affordable and easy to use:
1. Air Compressor with a Regulator
A small, oil-free air compressor (designed for air brushes) is a must—avoid large industrial compressors, which produce too much pressure. Look for a compressor with a built-in pressure regulator (a dial that lets you adjust PSI) and a gauge (to read the pressure). For miniatures, a 1/5 HP compressor (e.g., the Badger Air-Brush Co. TC-610) works well—it’s quiet and maintains steady pressure, unlike cheaper compressors that cycle on/off (causing pressure spikes).
2. In-Line Pressure Gauge (For Extra Precision)
Even if your compressor has a gauge, adding an in-line gauge (attached between the compressor and the air brush hose) gives you a more accurate reading. Compressor gauges often show “tank pressure” (the pressure stored in the tank), while in-line gauges show “working pressure” (the pressure actually reaching the air brush)—this difference can be 5–10 PSI, which matters for detail work. Brands like Paasche or Iwata make affordable in-line gauges (under $20) that attach via quick-connect fittings.
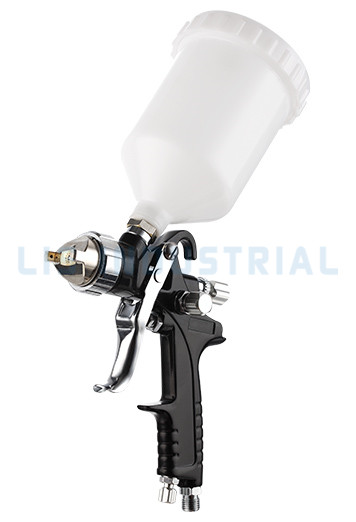
3. Air Brush with a Fine Nozzle
The air brush’s nozzle size affects how pressure interacts with paint. For miniatures, use an air brush with a 0.2mm–0.3mm nozzle (vs. 0.5mm for larger projects). A smaller nozzle requires lower pressure (since the paint has less space to flow through), making it easier to control for detail work. For example, an Iwata Neo CN with a 0.3mm nozzle pairs perfectly with 10–20 PSI for miniatures—larger nozzles would need higher pressure, which risks overspray.
4. Paint Mixing Tools (To Control Thickness)
Since paint thickness impacts pressure, tools to measure dilution are key. Use dropper bottles (to add precise amounts of water/thinner) or a mixing palette with measurement marks. For example, mixing 3 parts paint to 1 part thinner (a common ratio for acrylics) ensures consistency—if you thin paint differently each time, you’ll have to constantly adjust pressure, leading to uneven results.
What Common Mistakes Should Be Avoided When Setting Air Pressure for Miniature Air Brushing?
Even with the right tools, common mistakes can throw off pressure settings and ruin your miniature. Here’s what to watch for:
1. Setting Pressure Too High “To Speed Up Coverage”
Many beginners crank up pressure to cover the miniature faster, but this leads to overspray and lost details. For example, using 35 PSI to base coat a 28mm figure may cover it in 2 minutes, but it will blow away small details (e.g., the figure’s fingers) and leave a grainy finish. Slow down—18–20 PSI takes 5 minutes but preserves details and gives a smoother coat.
2. Ignoring Pressure Spikes from Compressors
Cheaper compressors often cycle on when the tank pressure drops, causing a sudden pressure spike (e.g., from 15 PSI to 25 PSI). This spike can ruin detail work mid-stroke (e.g., smudging an eye you’re painting). Fix this by:
- Using a compressor with a “tankless” design (maintains steady pressure) or a larger tank (reduces cycling).
- Waiting for the compressor to cycle off before resuming painting—let the pressure stabilize for 10 seconds after the compressor stops.
3. Not Testing Pressure on a “Practice Surface” First
Never spray directly on the miniature without testing pressure on a scrap piece of plastic (e.g., leftover sprue from the miniature’s mold). Spray a small dot or line on the scrap—if it’s smooth and precise, the pressure is good. If it sputters, clumps, or spreads too far, adjust before moving to the miniature. This simple step saves you from ruining hours of work.
4. Forgetting to Adjust Pressure When Switching Paints or Tasks
Switching from base coating (20 PSI) to detail work (12 PSI) without adjusting pressure is a common error. For example, if you finish base coating a figure’s armor at 20 PSI and immediately start painting its eyes without lowering pressure, you’ll almost certainly smudge the eyes. Get in the habit of checking the gauge every time you switch tasks or paints—keep a small note nearby (e.g., “Eyes: 12–15 PSI”) to remind yourself.
5. Using a Nozzle That’s Too Large for Miniatures
A 0.5mm nozzle (designed for large projects) requires higher pressure (25–30 PSI) to work, which is too much for miniatures. Even if you set pressure to 15 PSI with a 0.5mm nozzle, the paint won’t atomize well—it will come out as blobs. Stick to 0.2mm–0.3mm nozzles for miniatures; they pair perfectly with the 10–30 PSI range.
By matching pressure to your task, paint type, and tools, and avoiding these common mistakes, you’ll be able to achieve crisp, professional results with your air brush—whether you’re painting a tiny 10mm soldier or a detailed 75mm fantasy figure.